Old Fashioned Lamp Case
The North American Live Steamer, Volume 1 Number 11, 1957
With the increase in popularity of "Old Time" engines and equipment, especially in the larger gauges, there is also greater interest in some of the accessories for these engines. For the larger gauge engines of the 1870-80 period, an operating oil head light adds much and is a touch of realism hardly obtained so easily on any other part of the engine. The soft glow of the little oil flame not only looks good to bystanders as the miniature engines run after dark, but is a real pleasure to drive with.
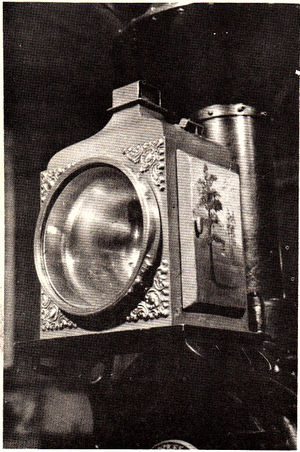
My lamp "case" or shell was made up of scraps of copper left over from the boiler. Any other material would do as well, for an essential of a lamp is a decorative paint job. Any material you use will be well covered. Once the general dimensions were figured, the various bits and pieces were cut out and silver soldered together. I used this method of construction simply because it was the easiest; soft solder, rivets, or small screws would work as well.
Perhaps the only fussy job with the case is the rim and "bushing" which hold the glass front. I threaded a piece of large brass tubing, cut off about a quarter inch of it, and silver soldered it to the front of the case. If you use this method, try to heat the whole front and the bushing evenly to avoid distortion. As a matter of fact, this job should be done first, so that if the pieces distort there won't be such a loss of work. A brass ring was then made with matching threads and a rim to hold the glass in place. I keep the ring polished for appearance.
While building the case I ran across some decorative "corners" from an old tin box (what its origin was I'll never know) and these seemed to fit in well in the front corners of my lamp. Failing such a "find" you could cut out some brass decorations (which I'll do on my next engine) or paint a decoration in the corners. Another source of ornamentation is the "jewelry" counter in the dime store.
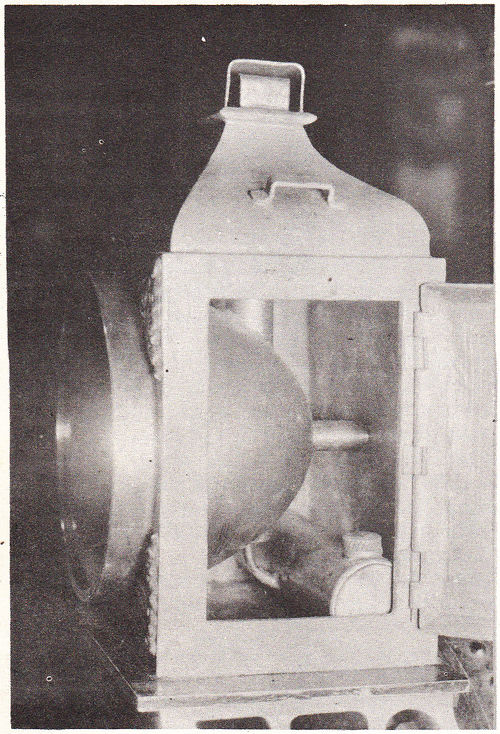
My door and right side panel were flanged over a simple form and were made of thin copper. The panel on the right side was silver soldered in place and the door has simple easily fabricated hinges silver soldered to it.
There are three parts you'll need for a working light, outside of the lamp body itself; a burner and reservoir, a glass chimney, and a reflector.
The reflector is, or should be, parabolic in form, for the simple reason that it will reflect most efficiently the feeble flow of the little flame. There are a number of ways of figuring the parabolic form. You can be real scientific about it and dig back for the equations and formulae you once learned and probably have forgotten. Or, you can suspend a bit of fine necklace chain between to points separated a distance equal to the diameter of the front of the reflector. The resulting loop can be adjusted as "deep" as you want it, and there's the outline of your reflector. The only trouble with this method is that you don't know the focal point--or where to place the center of the burner. The method I used is illustrated in one of the sketches I've included and is quick and easy to work out. You may find the focus point comes pretty close to the back of the reflector; too close to fit a chimney and burner in. In this case, you'll have to adjust the size and depth of the parabola to suit. The front portion of the reflector can be cylindrical without too much loss of efficiency.
Once you have the outline or pattern, make up a wood or metal form over which to spin the reflector. I you don't have luck with spinning, you can turn one "from the solid" in mighty quick order. The material you use doesn't matter a bit, as long as it can be polished and plated.
With the reflector formed you next cut holes in it for the chimney and vents. I used a couple of pieces of brass tubing (3/8 inch ID) and silver soldered them in place as per the sketch. And while you're silver soldering these in place, tack on a little lug or something similar at the back of the reflector to use for a rear fastening screw.
Next, polish the inside and have it chrome plated. This is about a two dollar job at a plating shop. Or, plate it yourself if you have the facilities.
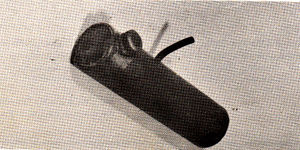
The lamp or burner and reservoir are easier yet. I used a piece of 3/4 inch copper tubing (left over from a superheater flue) and silver soldered two ends in it, plus a filling plug bushing and a little piece of 1/8 inch brass tubing which was later bent as shown so it would bit up inside the lower tube which you've put in the reflector. A few strands of glass fiber were shoved in the 1/8 inch tube to serve as a wick. They don't burn as would cotton and once adjusted for flame height work perfectly. I obtained my glass fiber for "thread" from the cover of a defective electric relay. Certain glass insulation material has fibers long enough to "spin" into a wick. The main idea is to use something that won't char or burn and change your flame size.
The chimney was blown from ordinary glass tubing such as you can get from larger drug stores or surgical supply houses. I tried some glass from a neon sign shop but it turned dark when I heated it enough to blow. It was O.K. heated to the point where it would bend but just that bit more to blow made it look sooty. You might try to get Pyrex tubing as it would stand the heat of the flame a bit better---but thus far I've not lost a chimney from the gentle heat of the little flame.
My chimney is about 5/16 inch in diameter at the top and bottom and bit over 3/8 inch at the bulbous portion. I used 1/4 inch tubing and blew it to this size to obtain a slightly thinner wall.
One of the tricks to this simple glass blowing is NEVER glow, or put pressure on the glass while you have it in the flame. The reason is that the thinner portions of the tube get hotter than the rest and will not resist the pressure, and a resulting hole blown in your embryo chimney. By applying pressure with the heated tube OUT of the flame, the thicker walls retain the heat longer and thus are pliable while the thin portions solidify and resists the pressure. It is almost impossible to flow a hole in heated glass while it is out of the flame.
The actual technique for the job is simple. First seal the end of the tube by heating the end in a Bunsen burner or other such flame. As the tube reaches a plastic state the end will close and seal. Then, a couple of inches up from the sealed end, warm the entire tube (all around) in a section about half as long as your chimney will be. When the glass is plastic as noted by the fact that it tends to bend easily, and is slightly orange red, remove it from the flame and flow gently into the open end of the tube. The air pressure will cause a little bulb to begin to form. Go slowly, returning the tube to the flame when it cools and you'll gradually be able to work out something that will fill the bill. If you're lucky, you might get a chimney the first try, if not, figure that glass is relatively cheap, and it's fun to work with.
Ordinarily, you cut the glass tubing by nicking it with a three corner file on one side and then snapping it off. This will work, but after going to the work of blowing a chimney, I think you'll want to take it a big easier. I use a tiny abrasive disk in a hand grinder and score all around the wall of the tubing. As the score gets deeper the chimney and the parent tube will part with no effort at all. Moreover, the edges are nicely ground and not sharp.
With my lamp, it was impossible to get the lighted burner in place without having the flame go out when it came near the relatively cold metal of the reflector. I worked and worked on this, but never could get the flame inside the glass chimney where I wanted it. I knew it would burn in a confined place O.K., for I'd made many experiments with little burners prior to putting it into headlight form. It turned out that the trick to the whole thing is to light the flame with the burner in place!
And since you can't get a match inside that little tube, the answer is to use an electric spark. I use an old high tension magneto (such as you could from an old gasoline engine or maybe from an old motorcycle engine) which, when given a brisk turn delivers a spark via a well insulated wire to the business end of the burner. Spark plug wire as used in auto ignition is too heavy to get inside the works of the lamp, so I used some plastic insulated wire as used in radio hook up work. While it isn't insulated for the eight to ten thousand volts that the little magneto puts out, it does do the job.
Kerosene will not light dependably with the spark. Or so I've found. So, instead use cigarette lighter fluid. Costs a bit more than kerosene, but a two bit can will last for months. With your glass fiber wick set right and the burner tube centrally located in the chimney (this latter is important, for if it is too close to the cold glass or metal it won't light) one twist of the magneto will light the lamp, and it'll burn all night, or until the fluid in the reservoir gives out.
And that's about all there is to it. Actually it's a much simpler job than I've made it sound. The results are worth every bit of effort you'll put in it. Our lamp lights the right-of-way ahead some eight or ten feet. We figure this can't be too far from "scale". And for those not riding, the sight of the little orange-yellow lamp coming around a curve in the dark makes it a bit hard to remember that the engine carrying it is only one-eighth full size.


