Building a Kitsap Caboose: Difference between revisions
No edit summary |
No edit summary |
||
| Line 2: | Line 2: | ||
by [[Daris A Nevil]] | by [[Daris A Nevil]] | ||
== Build Gallery == | |||
<gallery widths="400px" heights="400px"> | <gallery widths="400px" heights="400px"> | ||
| Line 7: | Line 9: | ||
File:Kitsap Live Steamers 2.jpg|The floor plats have been welded to the side beams. The center beam and bolster supports have been attached as well. The end beam has been welded to the end of the floor and the coupler pocket. The half rounds were previously brazed on the end beam. | File:Kitsap Live Steamers 2.jpg|The floor plats have been welded to the side beams. The center beam and bolster supports have been attached as well. The end beam has been welded to the end of the floor and the coupler pocket. The half rounds were previously brazed on the end beam. | ||
File:Kitasp Live Steamers Caboose 3.jpg|Top view of floor plats showing "stitch" welds. | File:Kitasp Live Steamers Caboose 3.jpg|Top view of floor plats showing "stitch" welds. | ||
File:Kitsap Live Steamers Caboose 4.jpg|Bottom view of the floor shows stitch welds. These welds were made using a red Lincoln "tombstone" welder (seen under the table) with 1/8 inch 6011 rods. | File:Kitsap Live Steamers Caboose 4.jpg|Bottom view of the floor shows stitch welds. These welds were made using a red Lincoln "tombstone" welder (seen under the table) with 1/8 inch 6011 rods. You must be very careful to prevent warpage during welding, even with this thicker material. By careful I mean make short stitch welds (1/4 inch) and allow to cool between welds (10-15 seconds). Use lots of C-clamps to hold materials tightly together during welding. | ||
</gallery> | </gallery> | ||
Revision as of 22:00, 16 June 2015
Build Gallery
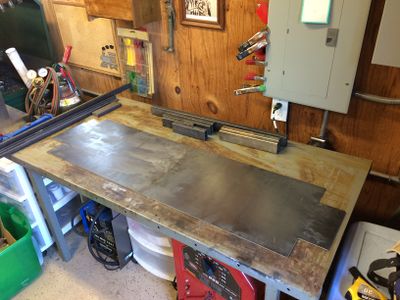
Laying out the base and other parts for the Kitsap Live Steamers caboose kit. Photo by Daris A Nevil, April 2015.
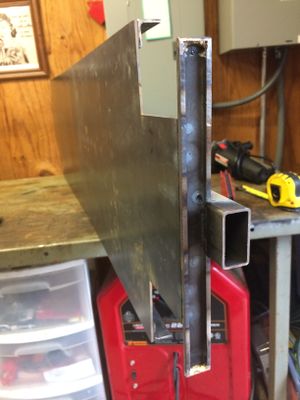
The floor plats have been welded to the side beams. The center beam and bolster supports have been attached as well. The end beam has been welded to the end of the floor and the coupler pocket. The half rounds were previously brazed on the end beam.
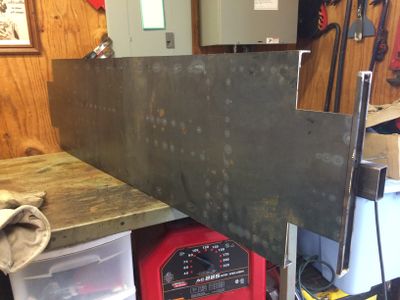
Top view of floor plats showing "stitch" welds.
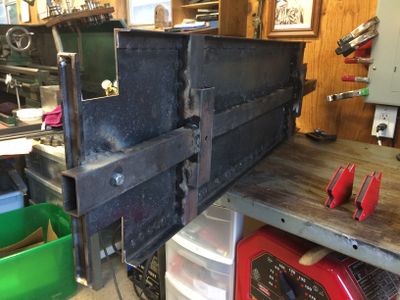
Bottom view of the floor shows stitch welds. These welds were made using a red Lincoln "tombstone" welder (seen under the table) with 1/8 inch 6011 rods. You must be very careful to prevent warpage during welding, even with this thicker material. By careful I mean make short stitch welds (1/4 inch) and allow to cool between welds (10-15 seconds). Use lots of C-clamps to hold materials tightly together during welding.


